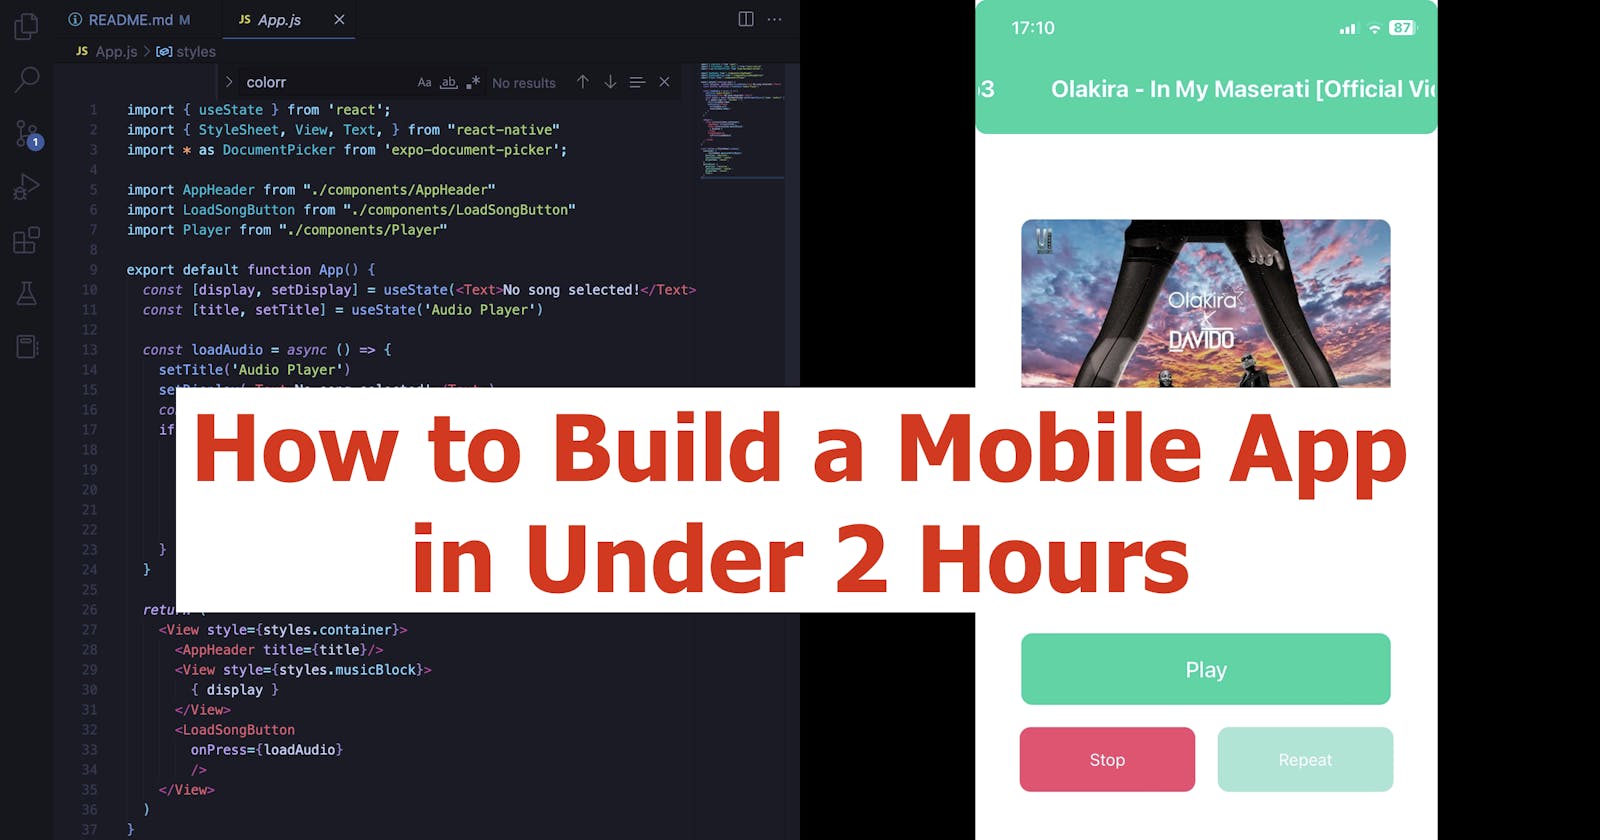
The Ultimate Guide to Building an Audio Player With React Native and Expo


Building a mobile app is a great asset to any developer’s portfolio. With mobile phones getting smarter each generation, it’s a skill that is only going to continue to grow. But building mobile apps can be quite difficult. Or so it was tough. Because today, I am going to prove the contrary. In today’s article, I am going to help you build your own mobile app. Some of the concepts I am going to discuss today are:
What is cross-platform and what are its pros and cons
How can JavaScript be used to develop mobile apps
Is it good practice to develop cross-platform applications?
From my point of view, the answer to this question depends a lot on the size of your app. I usually find that small projects can be easily built with cross-platform technology, while larger projects that need to scale, should be built with native. But what is native and what is cross-platform?
The difference between the two is quite simple and I think that the name gives away the definition. Native mobile development refers to a technology that is dedicated to a specific Operating System. For example, if you want to build specifically for iOS, it's recommended to use Swift. On the other hand, cross-platform is a technology that works on multiple operating systems. For example, you only use one programming language and develop for both iOS and Android. JavaScript is a nice example of a cross-platform language, with React Native being its 'engine' for mobile development.
Pros and Cons of using cross-platform
The mobile development community is somehow split with regard to using cross-platform technology. I too find the concept quite intriguing. And that is because with native, the API access is more hands-on and you have more control over the device. On the other hand, for small projects, I see no point in investing resources in two development projects for the same project. So let's see why use or not use cross-platform:
Pro: Reusability
With cross-platform mobile development, you only code a feature once and you get to use it at least twice. And that is for iOS and Android. If you want to expand on this idea, just know that components can also be shared between projects. And that is a new level of reusability.
Pro: Resources
Resources refer to two things: time and money. With cross-platform, you only need one team to work on a project for a given amount of time. With native, you need at least two teams to cover iOS and Android, and that means double the effort, double the money.
Pro: Consistency
When you use a single code for both iOS and Android, you get the same feel and functionality for your app on both platforms. With native, chances are there will be slight differences between the two versions of your app.
Con: Limited Design
Having to cover both iOS and Android in the back is no easy task for the cross-platform framework. That is why some aspects need to be limited to ensure functionality for both platforms. One of its limits is usually design. From experience, I find that cross-platform limits the opportunity of building a truly amazing UI/UX.
Con: Limited API Access
With cross-platform, you don't get full access to the device. Don't get me wrong, you will be able to create complex apps. But you might also come across scenarios that can be nearly impossible to implement. Or if there is a way to implement them, it requires all sorts of workarounds.
JavaScript in mobile development
If you're new to programming, you might heard that JavaScript powers the web. So using it for mobile development may sound counterintuitive. But for the past decade, JavaScript kept on pushing its limits. And today, nothing seems impossible when you 'talk' JavaScript.
I won't go in-depth regarding the history of JavaScript, but I will tell you that yes, it started as 'the language for the web' and became 'the language for (almost) anything'. Today, JavaScript is used for a variety of things. From building websites to building back-ends to building desktop and mobile apps.
The main JavaScript framework for mobile development is React Native. But I’m going to introduce you to Expo. Expo offers a bunch of tools that make React Native and cross-platform mobile development even easier.
And with that, I call it ‘a talk’. Let’s get to some real coding!
Building a mobile app with Expo and React Native
The title pretty much gives us the project. We’re going to build an audio player for mobile using React Native and Expo. The full code for this project is also available on my GitHub, here. Feel free to refer to it whenever you want. and below are some other useful resources:
React Native documentation
Expo Documentation
I am an advocate of using official documentation as a first resource for research. So if you’re ever stuck, try to figure out the solution by reading through the docs and only ask questions on StackOverflow as a last resort.
Prerequisites
This project requires Node JS and expo-cli to be installed locally. Also, an emulator is required to visualise your project. With expo, you can preview your app in real-time by using Expo Go. Type the following commands in your terminal to ensure you have the right tools installed:
# Check node version
~ » node -v
v16.19.0
# Check expo-cli version
~ » expo --version
6.0.5
If either of these commands returns an error, follow:
Apart from this, I recommend you have Expo Go on your phone. You could also use a device emulator. Yet, from experience, emulators tend to consume a lot of resources. So if you don't have a very performant machine, I think it's good practice to use the mobile's resources as well.
#1: Initialize the project
The following commands will help you set up a new directory and initialize the project using expo. More on how to create a new app with expo-cli can be found here.
# Create a new directory and cd into it
~ » mkdir app && cd app

# Create a new expo app
~/app » npx create-expo-app audio-player
✔ Downloaded and extracted project files.
✔ Installed JavaScript dependencies.

✅ Your project is ready!

# Navigate to directory and open it in your IDE
~/app » cd audio-player && code .
#2: Open the app on your phone
If you've chosen to use Expo Go, then you will be able to run your app in real-time on your phone. All changes you make will show instantly on your device. All you have to do in order to get started with it is to:
- Open a new terminal from your IDE and type the following command:
~/app » npm expo start
Starting Metro Bundler
▄▄▄▄▄▄▄▄▄▄▄▄▄▄▄▄▄▄▄▄▄▄▄▄▄▄▄
█ ▄▄▄▄▄ █   █▄ ▀▄▀█ ▄▄▄▄▄ █
█ █   █ █ ▀▄ █▀█ ▄█ █   █ █
█ █▄▄▄█ █▀██▀▀ ▀▄██ █▄▄▄█ █
█▄▄▄▄▄▄▄█▄▀▄█ █ █▄█▄▄▄▄▄▄▄█
█  ▀▀ ▄▄▀▀▀▀▄▀█▄ ███ ▀▄▄ ▄█
█▀██▄  ▄ ▀█▀ ▄▄█ ▀▀ █▄  ▀██
█ ▀▄▀█▄▄▄█▀▄█▄▀▄▀▄▀▄▀▀▄ ▀██
███ ▀▀▀▄ ▄▄██▀█▀▄▄▄█▄▀ ▀███
█▄▄▄█▄▄▄▄  ▀▄ █▄▄ ▄▄▄ ▀ ▄▄█
█ ▄▄▄▄▄ █▀█  ██▀▀ █▄█ ▀▀███
█ █   █ █▄▀ ▀▀▀▄█▄▄ ▄▄▀ ▀▀█
█ █▄▄▄█ █▀   ███▄██▄▀█▀▀ ██
█▄▄▄▄▄▄▄█▄▄████▄████▄▄▄▄▄▄█

› Metro waiting on exp://192.168.1.101:19000
› Scan the QR code above with Expo Go (Android) or the Camera app (iOS)

› Press a │ open Android
› Press i │ open iOS simulator
› Press w │ open web

› Press j │ open debugger
› Press r │ reload app
› Press m │ toggle menu

› Press ? │ show all commands

Logs for your project will appear below.
- As you can see, it generates a QR code. You can now scan the code with your mobile device to open up the app using Expo Go. Additionally, you can open a new emulator by pressing either
afor Android, orifor iOS.
#3: Add to the folder structure
As you saw, npx expo init generates a structured project. And the default structure looks like this:
.
├── node_modules
├── App.js
├── app.json
├── assets
│   ├── adaptive-icon.png
│   ├── favicon.png
│   ├── icon.png
│   └── splash.png
├── babel.config.js
├── package.json
└── yarn.lock
But, I like to keep things organised in directories. So, let's create two new directories inside the project:
components- Will hold the files for our react components. If you're not familiar with this term, please take a quick look here.constants- Will hold files with constants
#4: Start coding
We are now all set to build an audio player app with React Native and Expo. So let's get to it. First of all, open up App.js and delete everything inside it. Then add a most basic structure. It will get a bit more complex along the way, but for now, we need a clean start:
export default function App() {
  return (
    <View></View>
  )
}
And we'll leave App.js for now, and we'll focus our attention on the components. Ideally, we want to split our app into as many small 'chunks' as possible. But to determine what components we need, I think it's a good practice we sketch the app first.

App Components
Let's identify a couple of components for our app:
AppHeader- a header that displays the name of the song we're currently playingLoadSongButton- a button that opens up the files manager and lets the user open a new songPlayer- a container that displays an image and three buttons:play- to play the songstop- to stop the songrepeat- to play the song in a loop
With this in mind, we can start coding our components. So let's head to our components folder and create the files one by one, starting with the first:
AppHeader.jsx
// components/AppHeader.jsx
import React from 'react'
import { Dimensions, StyleSheet, View } from 'react-native'
import TextTicker from 'react-native-text-ticker'

export default function AppHeader(props) {
  return (
    <View
        style={styles.title}>
          <TextTicker
            duration={3000}
            loop
            bounce={false}
            style={styles.titleText}>
              { props.title }
          </TextTicker>
      </View>
  )
}
First of all, props are a very important concept in React Native. If you are not familiar with how properties work, I want you to go ahead and quickly check this out.
Moving on, I used TextTicker from react-native-text-ticker instead of a basic Text components. That is because longer song names won't fit on the screen and they expand on multiple lines. TextTicker allows us to animate the text and create a better UX. You should also install this package if you want to use it:
~/app » expo install react-native-text-ticker
Now let's add some style to our newly created component. We'll use StyleSheet API from React Native:
// components/AppHeader.jsx
const styles = StyleSheet.create({
    title: {
        height: 120,
        width: Dimensions.get('screen').width,
        backgroundColor: colors.green,
        alignItems: 'center',
        justifyContent: 'center',
        borderRadius: 10,
      },
      titleText:{
        marginTop: 40,
        textAlign: 'center',
        fontSize: 21,
        color: colors.white,
        fontWeight: 'bold',
      },
})
I'm also using Dimensions to get the device's full width. That will make my component fit the width of the device. One thing that I am sure you've already noticed is the keys used to style the components. In React Native, styling is very similar to CSS. The main difference is that, instead of dashes, we're using JavaScript's camelCase notation.
There is also one more thing I want you to notice. The values for color are not Strings. Instead, they are imported from an object called colors. And that's where I use constants. Head over to your constants directory and create a file named colors.js:
// constants/colors.js
export const colors = {
    'white': '#fff',
    'green': '#06d6a0',
    'disableGreen': '#a3e6d4',
    'red': '#ef476f',
    'yellow': '#ffd166',
    'blue': '#118ab2'
}
Now import colors into your file to be able to use its values:
// components/AppHeader.jsx
import { colors } from '../constants/colors';
For what is worth, our first component is done! Let's move to the next one:
LoadSongButton.jsx
// components/LoadSongButton.jsx
import { Dimensions, StyleSheet, TouchableOpacity, Text } from "react-native";
import { colors } from '../constants/colors'

export default function LoadSongButton(props) {
  return (
    <TouchableOpacity
        onPress={props.onPress}
        style={styles.loadBtn}>
          <Text
            style={styles.loadBtnText}>
            Load Audio
          </Text>
    </TouchableOpacity>
  )
}

const styles = StyleSheet.create({
    loadBtn: {
        height: 100,
        width: Dimensions.get('screen').width,
        backgroundColor: colors.green,
        alignItems: 'center',
        justifyContent: 'center',
        borderRadius: 10,
        bottom: 0
      },
      loadBtnText: {
        textAlign: 'center',
        fontSize: 21,
        color: colors.white,
        fontWeight: 'bold',
      }
})
This time, we're using TouchableOpacity to create a button. Note how its onPress value is a function passed as a parameter. It's not a function that we're defining locally. You will see why when we start to 'glue' all the pieces together inside App.js.
Player.jsx
Spoiler alert: This is our most complex component. So get ready to spend some time on it. I will first add the structure the style, and then work on its logic:
// components/Player.jsx
import { colors } from '../constants/colors'
import { StyleSheet, Text, View, Image, Dimensions, TouchableOpacity } from 'react-native'

export default function Player() {
  return (
    <View style={styles.songCard}>
        <Image
            style={styles.img}
            source={img}/>
        <TouchableOpacity style={styles.playBtn} title="Play" onPress={playSound}>
            <Text style={styles.textPlay}>Play</Text>
        </TouchableOpacity>
        <View style={styles.smallBtns}>
            <TouchableOpacity style={styles.stopBtn} title="Stop" onPress={stopSound}>
                <Text style={styles.smallBtnText}>Stop</Text>
            </TouchableOpacity>
            <TouchableOpacity style={{...styles.repeatBtn, backgroundColor: repeatBtnColor}} title="Stop" onPress={repeatSound}>
                <Text style={styles.smallBtnText}>Repeat</Text>
            </TouchableOpacity>
        </View>
    </View>
  )
}
Yet we agree that the magic of React stands in its components. And there is a pattern I think we can use to split this component into even smaller components. Did you see it? Yes, it's the TouchableOpacity (aka the buttons). They all share the same structure: a Text inside a TouchableOpacity. So let's refactor our code. Go ahead and create a new components/Button.jsx file:
// components/Button.jsx
import React from 'react'
import { TouchableOpacity } from 'react-native'

export default function Button(props) {
  return (
    <TouchableOpacity style={props.btnStyle} title={props.title} onPress={props.onPress}>
        <Text style={props.textStyle}>{ props.title }</Text>
    </TouchableOpacity>
  )
}
With this added, let's change our Player component:
// components/Player.jsx

import { colors } from '../constants/colors'
import { StyleSheet, Text, View, Image, Dimensions, TouchableOpacity } from 'react-native'
import Button from './Button'

export default function Player(props) {
  return (
    <View style={styles.songCard}>
        <Image
            style={styles.img}
            source={img}/>

        <Button
            title='Play'
            onPress={playSound}
            btnStyle={styles.playBtn}
            textStyle={styles.textPlay}/>

        <View style={styles.smallBtns}>
            <Button
                title='Stop'
                onPress={stopSound}
                btnStyle={styles.stopBtn}
                textStyle={styles.smallBtnText}/>
            <Button
                title='Repeat'
                onPress={repeatSound}
                btnStyle={{...styles.repeatBtn,  backgroundColor: repeatBtnColorr}}
                textStyle={styles.smallBtnText}/>
        </View>
    </View>
  )
}


const styles = StyleSheet.create({
    songCard: {
        padding: 10,
        backgroundColor: colors.white,
        alignItems: 'center',
        justifyContent: 'center',
    },
    img: {
        width: Dimensions.get("window").width * 0.8,
        height: Dimensions.get("window").width * 0.8,
        borderRadius: 10,
    },
    playBtn: {
        marginTop: 40,
        padding: 20,
        borderRadius: 10,
        margin: 10,
        width: Dimensions.get("window").width * 0.8,
        textAlign: 'center',
        backgroundColor: colors.green
    },
    textPlay:{
        color: colors.white,
        textAlign: 'center',
        fontWeight: '500',
        fontSize: 20,
    },
    smallBtnText:{
      padding: 20,
      fontSize: 15,
      color: colors.white,
      textAlign: 'center',
    },
    smallBtns:{
      flexDirection: 'row',
      flexWrap: 'wrap',
    },
    stopBtn:{
      backgroundColor: colors.red,
      margin: 10,
      width: Dimensions.get("window").width * 0.38,
      borderRadius: 10,
    },
    repeatBtn:{
      margin: 10,
      width: Dimensions.get("window").width * 0.38,
      borderRadius: 10,
    }
})
Things look much cleaner now. If you saved and refreshed the files, you probably got some errors. But don't worry about it. It's because we used some functions inside our onPress parameters, but the functions have not yet been defined. The following logic goes between export default function Player() { and return (:
First, let's useState and define some variables:
export default function Play(props) {
    const [sound, setSound] = useState();
    const [img, setImg] = useState(require('../assets/idk.png'))
    const [repeat, setRepeat] = useState(false)
    const [repeatBtnColor, setRepeatBtnColor] = useState(colors.disableGreen)
    ...
Where:
soundis used to store information about the song we're loading from our file managerimgis used to store the location of the image we'll display for our app. Its default value is theidk.pngmage inside theassetsfolder (the one displaying a question mark)i.repeatis a boolean that let's us play our song in a loop or just one time. It's set tofalseby default.repeatBtnColorchanges appearance for the repeat button.colors.disableGreendisplays a pale green background (#a3e6d4).
Next, let's work on our logic:
// components/Player.jsx
export default function Play(props) {
    ...
    const playSound = async () => {
        await Audio.setAudioModeAsync({ playsInSilentModeIOS: true});
        const { sound } = await Audio.Sound.createAsync({ uri: props.uri });
        await sound.setIsLoopingAsync(repeat)
        setSound(sound);
        await sound.playAsync();
    }

    const stopSound = () => setSound(null)

    const repeatSound = async () => {
        setRepeatBtnColor(repeatBtnColor === colors.disableGreen ? colors.green : colors.disableGreen)
        setRepeat(repeat === false ? true : false)
    }
    ...
Where:
playSound()uses theAudioobject from Expo's Audio Video API. It loads the song, sets its loop state using therepeatvariable we set before and plays the songstopSound()empties the sound variablerepeatSound()sets the button colour togreenordisabledGreenand the repeat state totrueorfalseusing the ternary operator in both cases
But see how we have no method to display an image based on the song name. For this, I came up with a workaround using the Google Search API. Let's add the following method:
import axios from 'axios';
import { useEffect } from 'react';
...
    const getCoverImage = async () => {
            try{
              let r = await axios.get(`https://www.googleapis.com/customsearch/v1?key=${GOOGLE.API}&cx=${GOOGLE.CX}&q=${encodeURIComponent(props.name)}&searchType=image&fileType=jpg&imgSize=large&alt=json`)
              setImg({uri: r.data.items[0].link})
            } catch (e) {
                console.error(e)
            }
        }

     useEffect(()=>{
            getCoverImage()
     }, [props.name])
...
Now for this to work, you will need to get an API key and a search engine ID (CX). You can learn more about how to get these two from here. I stored the values associated with the two in a new constants/google.js file:
// constants/google.js
export const GOOGLE = {
    API:'API_KEY',
    CX:'SEARCH_ENGINE_ID'
}
Finally, as per Expo's documentation, we need to add one more code snippet to unload (stop) the music:
...
    useEffect(() => {
        return sound
          ? () => {
              sound.unloadAsync();
            }
          : undefined;
    }, [sound]);
return (
    <View> ...
)}
App.js
Now all we need to do is to put all the pieces together inside our App.js file. Again, I'll split it into two sections: structure + style and functionality:
import { useState } from 'react';
import { StyleSheet, View, Text, } from "react-native"
import * as DocumentPicker from 'expo-document-picker';

import AppHeader from "./components/AppHeader"
import LoadSongButton from "./components/LoadSongButton"
import Player from "./components/Player"

export default function App() {
    ...
  return (
    <View style={styles.container}>
      <AppHeader title={title}/>
      <View style={styles.musicBlock}>
        { display }
      </View>
      <LoadSongButton
        onPress={loadAudio}/>
    </View>
  )
}

const styles = StyleSheet.create({
  container: {
    ...StyleSheet.absoluteFillObject,
    position: 'absolute',
    justifyContent: 'center',
    alignItems: 'center',
  },
  musicBlock: {
    position: 'relative',
    justifyContent: 'center',
    alignItems: 'center',
    flex:1
  }
})
As you can see, we're importing the three components we have created and we're simply rendering them inside a View. Note how inside the musicBlock view we are using a variable to render some info. We'll define that variable in just a moment. Design-wise, I am calling StyleSheet.absoluteFillObject that's used to get the header sticky on the top and the load button on the bottom.
Now let's add the logic and I'll tell you what it does afterwards:
// App.js
...
export default function App() {
  const [display, setDisplay] = useState(<Text>No song selected!</Text>)
  const [title, setTitle] = useState('Audio Player')

  const loadAudio = async () => {
    setTitle('Audio Player')
    setDisplay(<Text>No song selected!</Text>)
    const audio = await DocumentPicker.getDocumentAsync({ type: 'audio/*' })
    if ( audio.type === 'success' ) {
      setTitle(audio.name)
      setDisplay(<Player
        uri={audio.uri}
        name={audio.name}/>
      )
    }
  }

  return ( ...
)}
The
displayvariable is initialised with a value that holds aTextreact component. When there is no song loaded, we'll just display a text...The
titlevariable is initialised with a string that holds the name of our app ('Audio Player').The
loadAudio()function opens a newDocumentPickerthat only accepts audio files. If the document is successfully loaded, then it creates aPlayercomponent and sets itsprops.
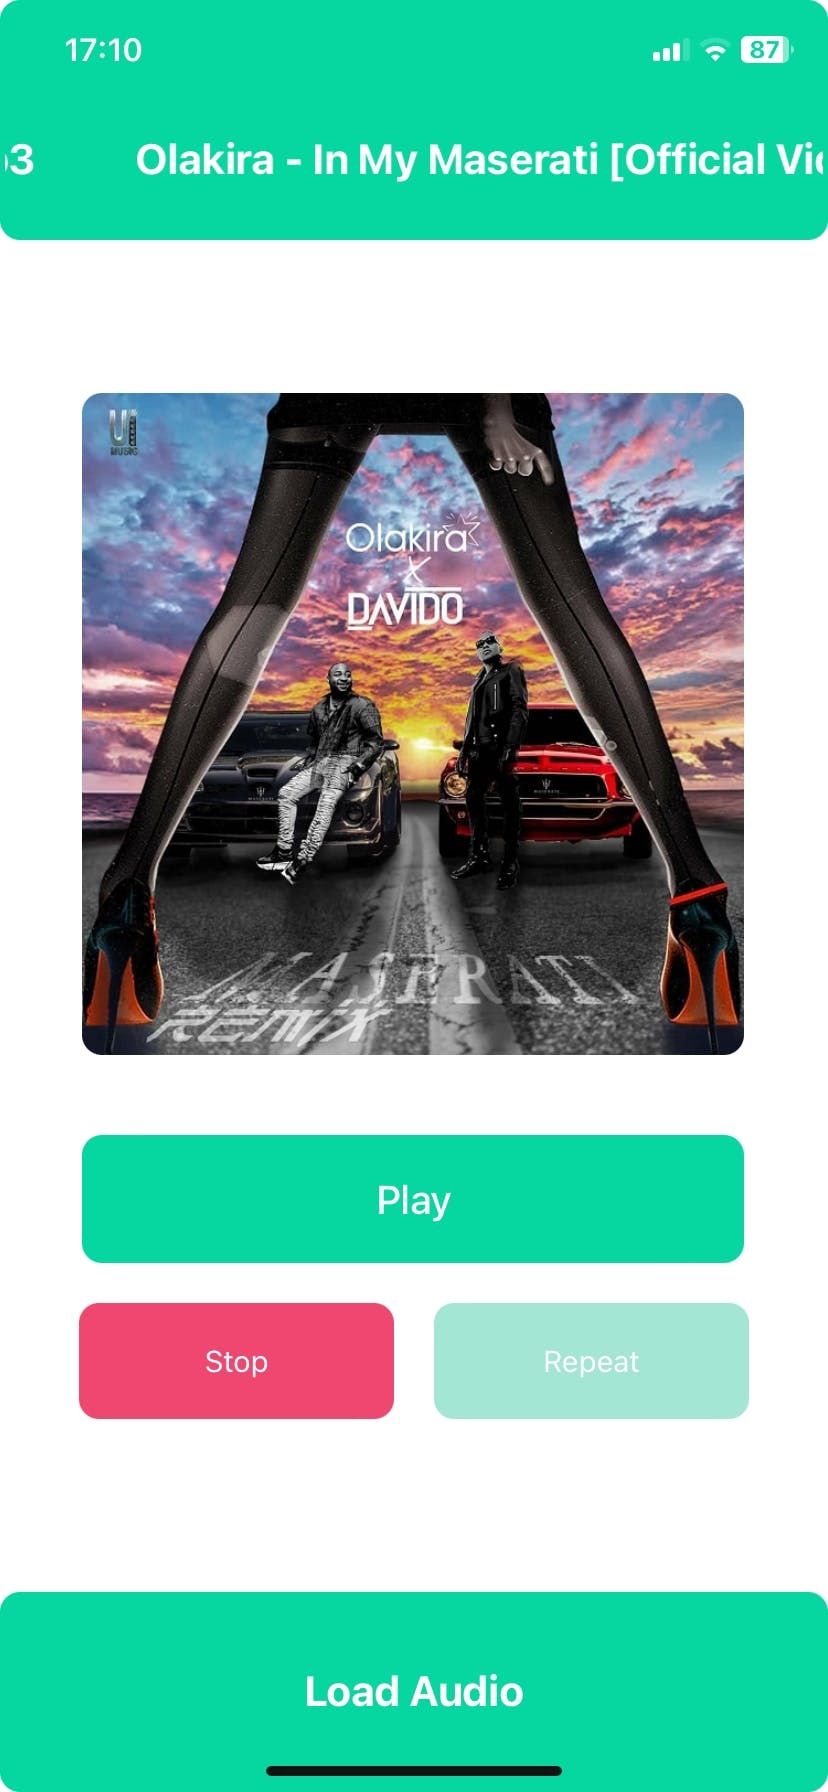
That is it. If you followed my instructions, you should now have a fully functional audio player for your mobile device. And here is how it should look:
I also added this project to a GitHub repo. You can browse the full code here.
Conclusions
As long as you understand key concepts, like components for example, building a mobile app with React Native and Expo is as easy as it can be. Of course, there are pros and cons to using a cross-platform framework over native development. But it depends on what your project aims to do. For small projects and indie developers, React Native the best way to go. At least from my point of view.